ASC Web Services Knowledge Base

Bookshelf with books


How can we help you?

Services

Access to the Drupal Content Management System (CMS) works on the basis of roles. These roles control what level of editing access is available to a particular user of a site.


Roles

For the College of Arts and Sciences, there are four major roles:

  • Form Viewer (FV)
  • Content Editor (CE)
  • Content Manager (CM)
  • Form Manager (FM)

The latter three have a corresponding training course that must be taken prior to being assigned. Additional training for two supplemental roles are also available:

  • Research Manager (RM)
  • Newsletter Manager (NM)

These roles focus more on specific Drupal 8 functions. You may review training materials post-course via the links in the Roles section below.

If you haven’t taken the relevant Drupal training course, please have your Web Content Owner follow the button below to submit a ticket.

If you do not know who your web content owner is, please submit a ticket.

Request training access

ASC Web Services provides units analytics reports via Google Data Studio.

Using the Google Analytics platform, Data Studio provides a quick, readable report on your website.


What’s Covered

Your report will contain a high-level overview of traffic on your website.

You’ll receive stats on the top pages for your site as well as sections of interest (like an Undergraduate section).

From here, we branch out a bit to give you a quick glance at demographics, what people search for to find your site, and more!

All College of Arts and Sciences Departments and Centers are eligible for free web support and hosting on our Drupal platform. Whether you don’t currently have a website or would like to move from a paid solution, we have your back!

With our platform you receive:

  • Pre-built Arts and Sciences templates
  • Free hosting for your website
  • Support for any web problems
  • In-depth training
  • Automatic security patching and updates
  • An easy, simple editing interface

For smaller groups we also offer assistance with utilizing the U.OSU platform.

Even if you or your group does not qualify for a Drupal website, we can still help!

For more advanced use cases, our Application Development group takes on custom sites at unit expenses.

Legacy non-Drupal applications and websites are eligible for hosting on ASC’s Tri-Dub server.

Request a New Website

Need web help? Contact ASC Technology Services today!

Web Services Group
475 Mendenhall Lab
125 Oval Dr S
Columbus, OH 43210

Hours: 9:30–5:30, Monday – Friday

If you are looking for further options, please visit the overview of all services provided by ASC Web Services.

You may also send a voicemail to 614-247-7071, but please use the below link to help first!

Request Website Help

Resources

Want to connect with your fellow content editors and easily reach out to the Web Services team?

We have a space where you can chat with others who manage content on ASC Drupal sites, offer feedback and get direct support for questions from the Web Services team.

Join the Team!

Below is the full playlist of videos included in the Frequently Asked Questions (FAQ) series.

If you are interested in a specific video from the FAQ series, you can review it from the list below.

Content


Users


Updating files

How to Use Images on Drupal

  1. Crop an image to the exact size and content that you wish to display
  2. Save the image so that, on an average, its physical size is approximately 50-100 K
  3. Most importantly, make sure that your final image is clear and crisp – even if it means skipping the steps above
  4. All these values are given with the understanding that they are for the average image
    • As with all rules, there will be exceptions


Required Image Sizes for ASC Drupal Feature Modules

  • Events image: 600 pixels x 400 pixels
  • News image: 600 pixels x 400 pixels
  • People images: 300 pixels x 400 pixels


Advanced Modules

  • Slideshow Images: 1600 pixels x 900 pixels
  • Single Column Media: 1600 pixels x 900 pixels
  • Callout Boxes: 800 pixels x 500 pixels
  • Use any image editing software to change your images to the correct size
  • As OSU employee, you should have access to the Adobe CC Suite.
    • The Suite includes Photoshop, an excellent option to make adjustments to images


Adding an Image/Photo to a Drupal Web Page

To add an image:

  1. Put your cursor at the location in which you want the image to appear
  2. Select the Image Insert/ Edit icon button
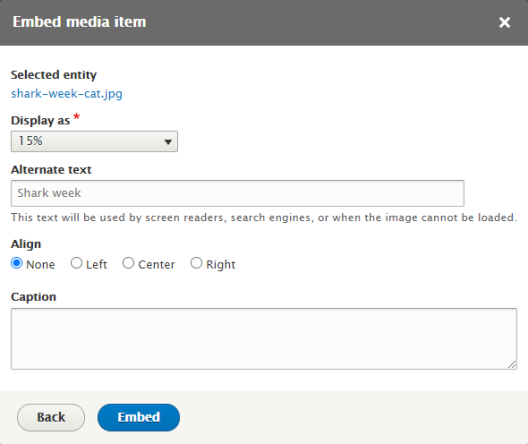
  3. The Image Properties dialogue box will open (see example below)
  4. If the image is already uploaded to your site, you can search for it in the view images tab using the media name
    • If it’s a new image, you will select the Upload Images tab to upload the image
Embed media item prompt window showing selected media file, display as percentage size, alt text field, alignment and caption


Be Accessible! Add Alternative Text

Alternative Text is required for an image to be accessible

  • Make the text descriptive
  • Remember that the purpose of the image (if it has a purpose) is more important than the image description.
    • For example, the alternative text for a help button that displays a question mark should be ‘Help’ not ‘Question Mark.
  • If description needs to be of the image, be succinct (more than 150 characters/3-12 words) OR use line4
  • Make text unique between images

Open Office Hours and Presentations

If you have a role editing or managing content on our Drupal 9 standard sites, you’re welcome to join us for monthly trainings and open office hours to learn about our sites’ features, tips, best practices and to ask questions and provide feedback!

Every month, our team will conduct a training session based on your suggestions about a subject you’d like to learn more about.

Additionally, we’ll hold open office hours once a month for you to stop by with any questions you have related to using our sites’ tools.
 

Training Sessions

We’ll cover a variety of topics related to the ASC websites like how to use new features, analytics and how to write for the web. We’ll use the feedback you provide to know what subjects you want to learn!

If you’re a content editor or manager, you’ll receive a regular email invitation from us that you’re free to RSVP to and join us to learn more about our websites.


Open Office Hours

We’ll also hold our open office hours, where a member of our team will be available to talk with and walk you through any questions you have about using the Drupal 9 standard sites.
 

Schedule

Our current schedule for our training sessions and office hours are:

  • Trainings: 2nd Tuesday of each month
  • Open Office Hours: 4th Tuesday of each month


Recorded Training Archive

You don’t have to attend an in-person training session to learn about our sites’ features, best practices and other interesting topics that our users want to know more about.

You can review any recorded training presentation topic on our YouTube channel's playlist.

Recorded Training Presentation Playlist

Writing for the Web

Because of the way we read text on screens, average users skim most text and instead choose to scan pages for relevant information instead

Only 16% of people will read every word on the page; this means 4 out of 5 people will not read everything on a page

Most people skip through the page, scan the content for what they are looking for and read through the headlines.

For years, usability researchers found that web users rarely read entire pages word for word

Web Users

  • Scan pages
  • Pick out keywords and phrases
  • Read in quick, short bursts
  • Are action oriented
  • Search for key bits of information that lead them towards goal
  • Ignore most text because of the difficulties of reading on the Web

Tips


Use short sentences and paragraphs


Don’t be too wordy

  • If you can say it in less words then do


Use bullets and bold words

  • Pick out the key points that you are wanting to get across
  • Bold important words so their eye catches the key parts


Clear headlines and subheads

  • This helps when people are scanning the page for what they are looking for


Leave whitespace on page

  • Don’t make your page too crowded with content; this helps legibility


Use simple, familiar words

  • Avoid trying to sound too formal or “fancy” with the vocabulary
  • Try to be simple and to the point
  • This way, people will read through and process your content faster


Avoid trying to be clever or creative

  • Be simple and to the point, people don’t want to have to interpret what you are saying


Use Images as support

  • Make sure they support the information in the text
  • Don’t use too many images for just texture


Address your readers directly

  • Use the word ‘you’ to grab the reader’s attention


Use Active Voice; Avoid Passive Voice


Inverted Pyramid Style of Writing

  • The Inverted Pyramid (Purdue Online Writing Lab, Purdue University)
  • A traditional structure in mainstream journalism writing
  • Most important facts are in first sentences
  • Less important information appears in following paragraphs
  • First paragraph (lead) provides essential information; Who, What, Where, When and Why
  • Following paragraphs (called a “nut graph”) list additional details, quotes, stats, etc
  • Structure priorities essential details first, then describes secondary information down the article


Do not use ‘click here’


Have your links end the sentence

  • Try to arrange your sentence so that it ends with their action


Proofread

  • Proofread your content before you publish it
  • When people see typos they lose trust in your site


People won’t just land on your front page

  • Many people search for something and click directly into the first page they see has that info
  • Look at the analytics of your website to learn where people are coming from to your site


Read what’s on your site

  • Outline what pages you have on your site and what is the path people need to take to get to important information


Create Personas

  • Think about who you are writing for
  • Imagine you are these people
  • Create a persona for the types of users that you expect to visit your site
  • Imagine what info would be useful for them
  • Think less about what you or your higher-ups want to publish
  • Think of ways to be more useful and kind to the people you want to reach to and imagine what ways could be helpful to them


Resources on the Web

A List Apart


Online Articles


Tips from other Universities


Resources on campus

  • If you are staff or faculty at the College of Arts and Sciences, you can speak with the ASC Communications Team and we can talk through suggestions for your website
     
  • If you’re outside the College of Arts and Sciences, consider talking with your unit’s communications team to see what changes you can make to your website

Drupal Roles

Content Editor

Below is the full playlist of videos included in the Content Editor training for Drupal 8.

You can review any materials here or can follow the link below to see them on YouTube.

Features

  • Create and edit:
    • Basic pages
    • Event pages
    • Image and video galleries
    • News stories
    • People pages

    Content tab in Drupal with the section Add Content open and options to create Events, Image and Video galleries, and news stories
    People tab in drupal with the option to add users
    Editing a basic page in Drupal with the content editor role


    Content Manager

    Below is the full playlist of videos included in the Content Manager training for Drupal 8.

    You can review any materials here or can follow the link below to see them on YouTube.

    Features

    • Create and edit:
      • Landing pages
      • Basic pages
      • Event pages
      • Image and video galleries
      • News stories
      • People pages

      Content manager's view of Content tab in Drupal with the options to create the following: basic page, events, video and image galleries, landing pages, news stories
      People tab in drupal with the option to add users
      content manager's view of editing a landing page
      Image of a landing page that content managers can create


      Course Manager

      Below is the full playlist of videos for the Course Manager training for Drupal 8.

      You can review any materials here or can follow the link below to see them on YouTube.

      Features

      • Import courses from the SIS database
      • Editing courses on site
      • Creating and deleting courses

      View on YouTube

      Courses landing page on Drupal with a table of links for courses
      Information about a course on Advanced Collaborative Design
      Course on Advanced Collaborative Design with decorative infograph

      Form Viewer

      As a Form Viewer, you have access to view submissions to pre-defined webforms on your website.

      To receive access, you’ll need your Web Content Owner or a Form Manager to request it for you.


      Logging In

      Once you know you have access, it’s time to log in.

      Go to the bottom right of any page on the website and click on the white “LOGIN” link.

      This should bring you to your user profile by default. However, at the top of the page, you now have access to a limited administrative toolbar.


      Navigating to a Form

      To get to a list of all webforms you can access, hover over “Structure” and click on the “Webforms” option that drops down.

      Screenshot showing location of the Structure tab while highlighting the Webforms link inside it


      You should see a page that appears like the below, with a list of any webforms you have access to as well as quick links to view the form itself or a list of submissions.

      Screenshot of the Structure page in Drupal with a link to a webform at the top of the list


      Submissions

      Clicking on “Submissions” will bring you to a table view of every submission’s questions and answers.

      If there are files associated with an entry a link will be provided to download this.

      List of webform submission results for a webform

      Downloading

      You might notice a “Download” button near the top of the interface.

      If you select this option and scroll to the bottom, there is a blue “Download” button that will let you get an Excel file of all the information in the previous table.


      Logging Out

      Finally, to log out of the site, you can hover over the blue Drupal 8 logo in the administration bar and click on the “Logout” link.

      The log out link showing after clicking the Drupal icon in the top left of the screen

      Form Manager

      Below is the full playlist of videos for the Forms Manager training for Drupal 9.

      You can review any materials here or can follow the link below to see them on YouTube.

      Features

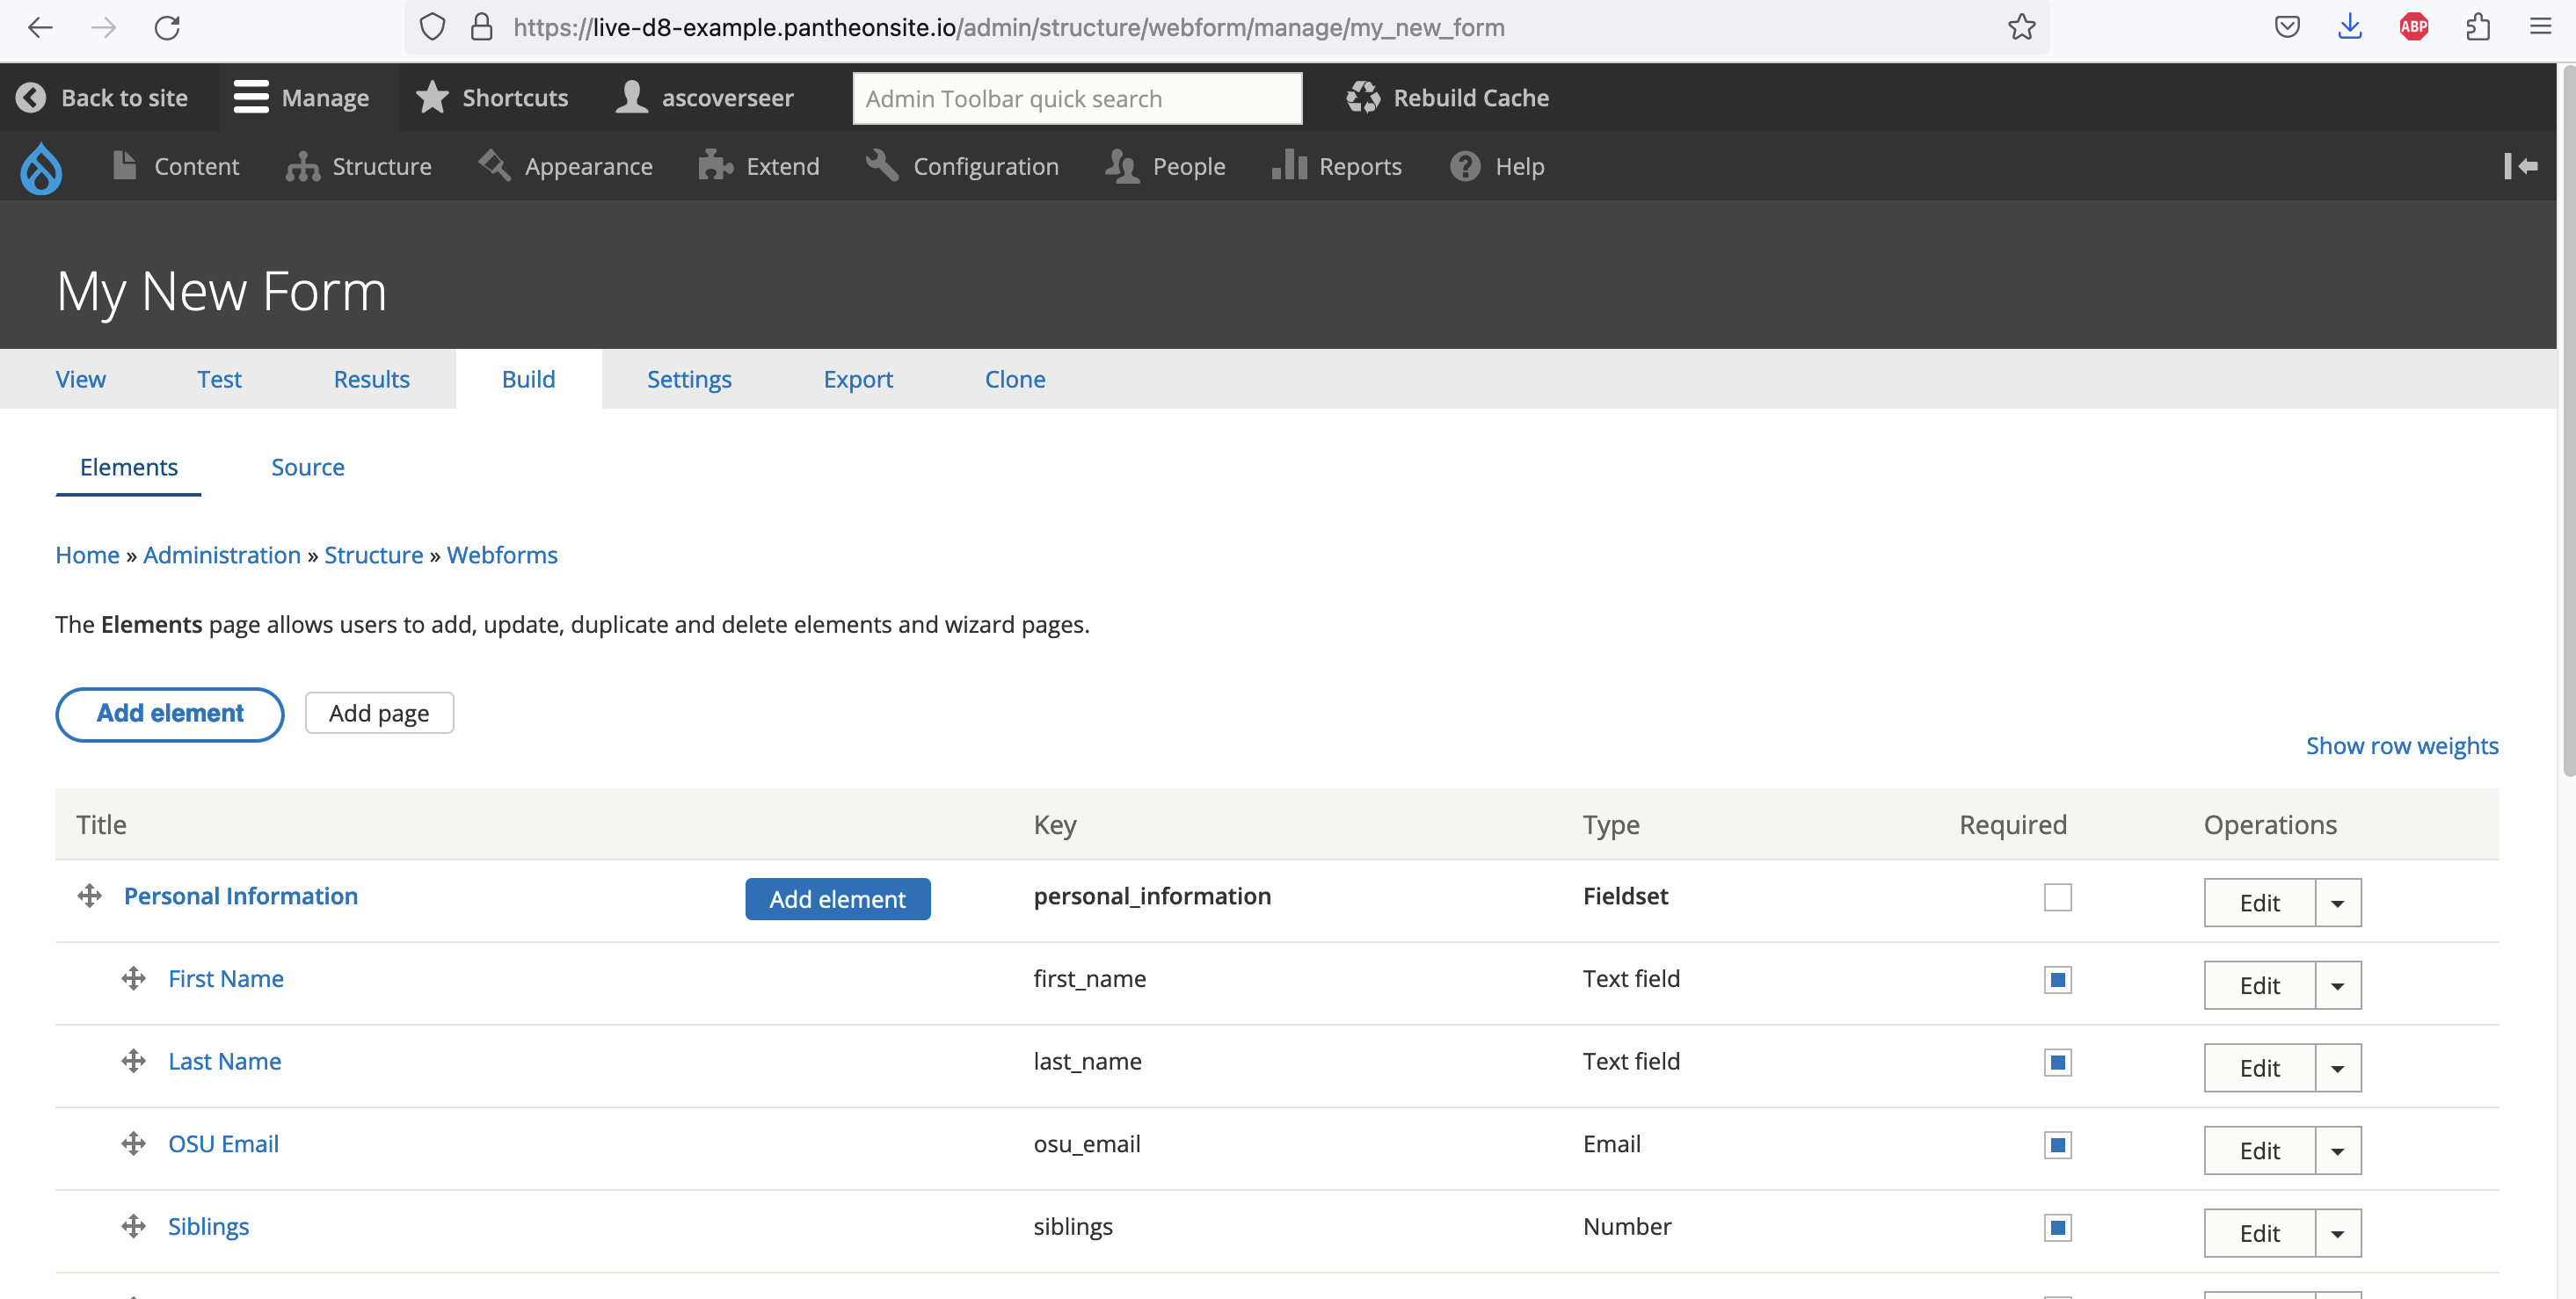
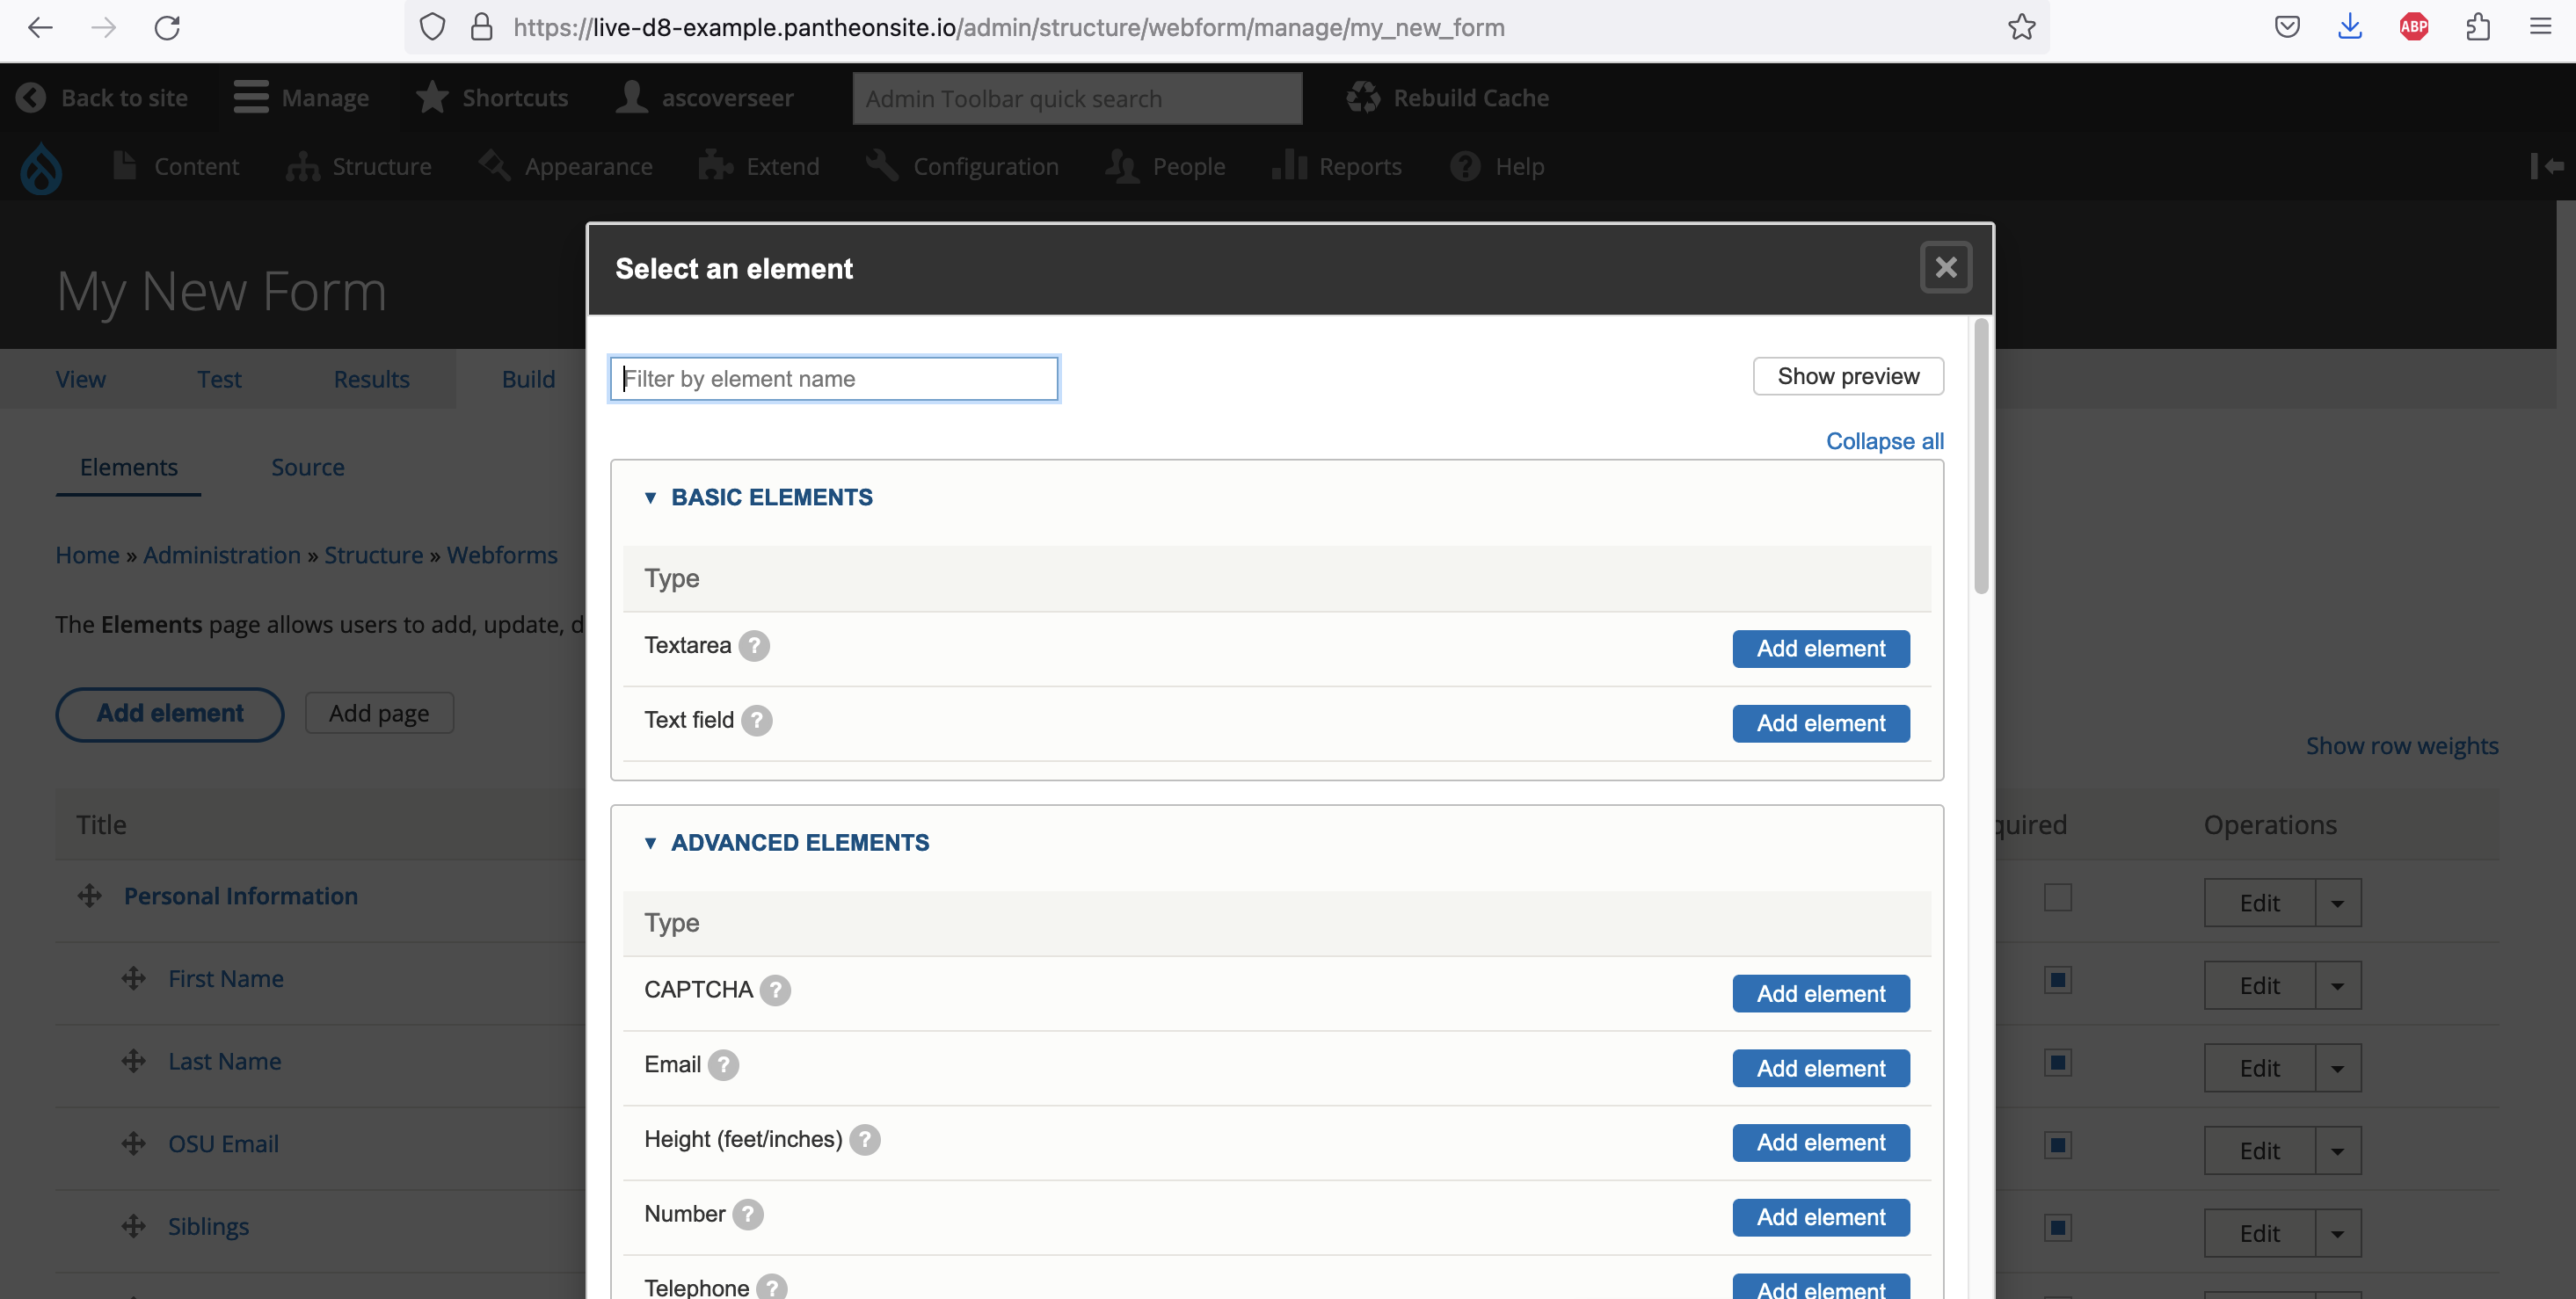
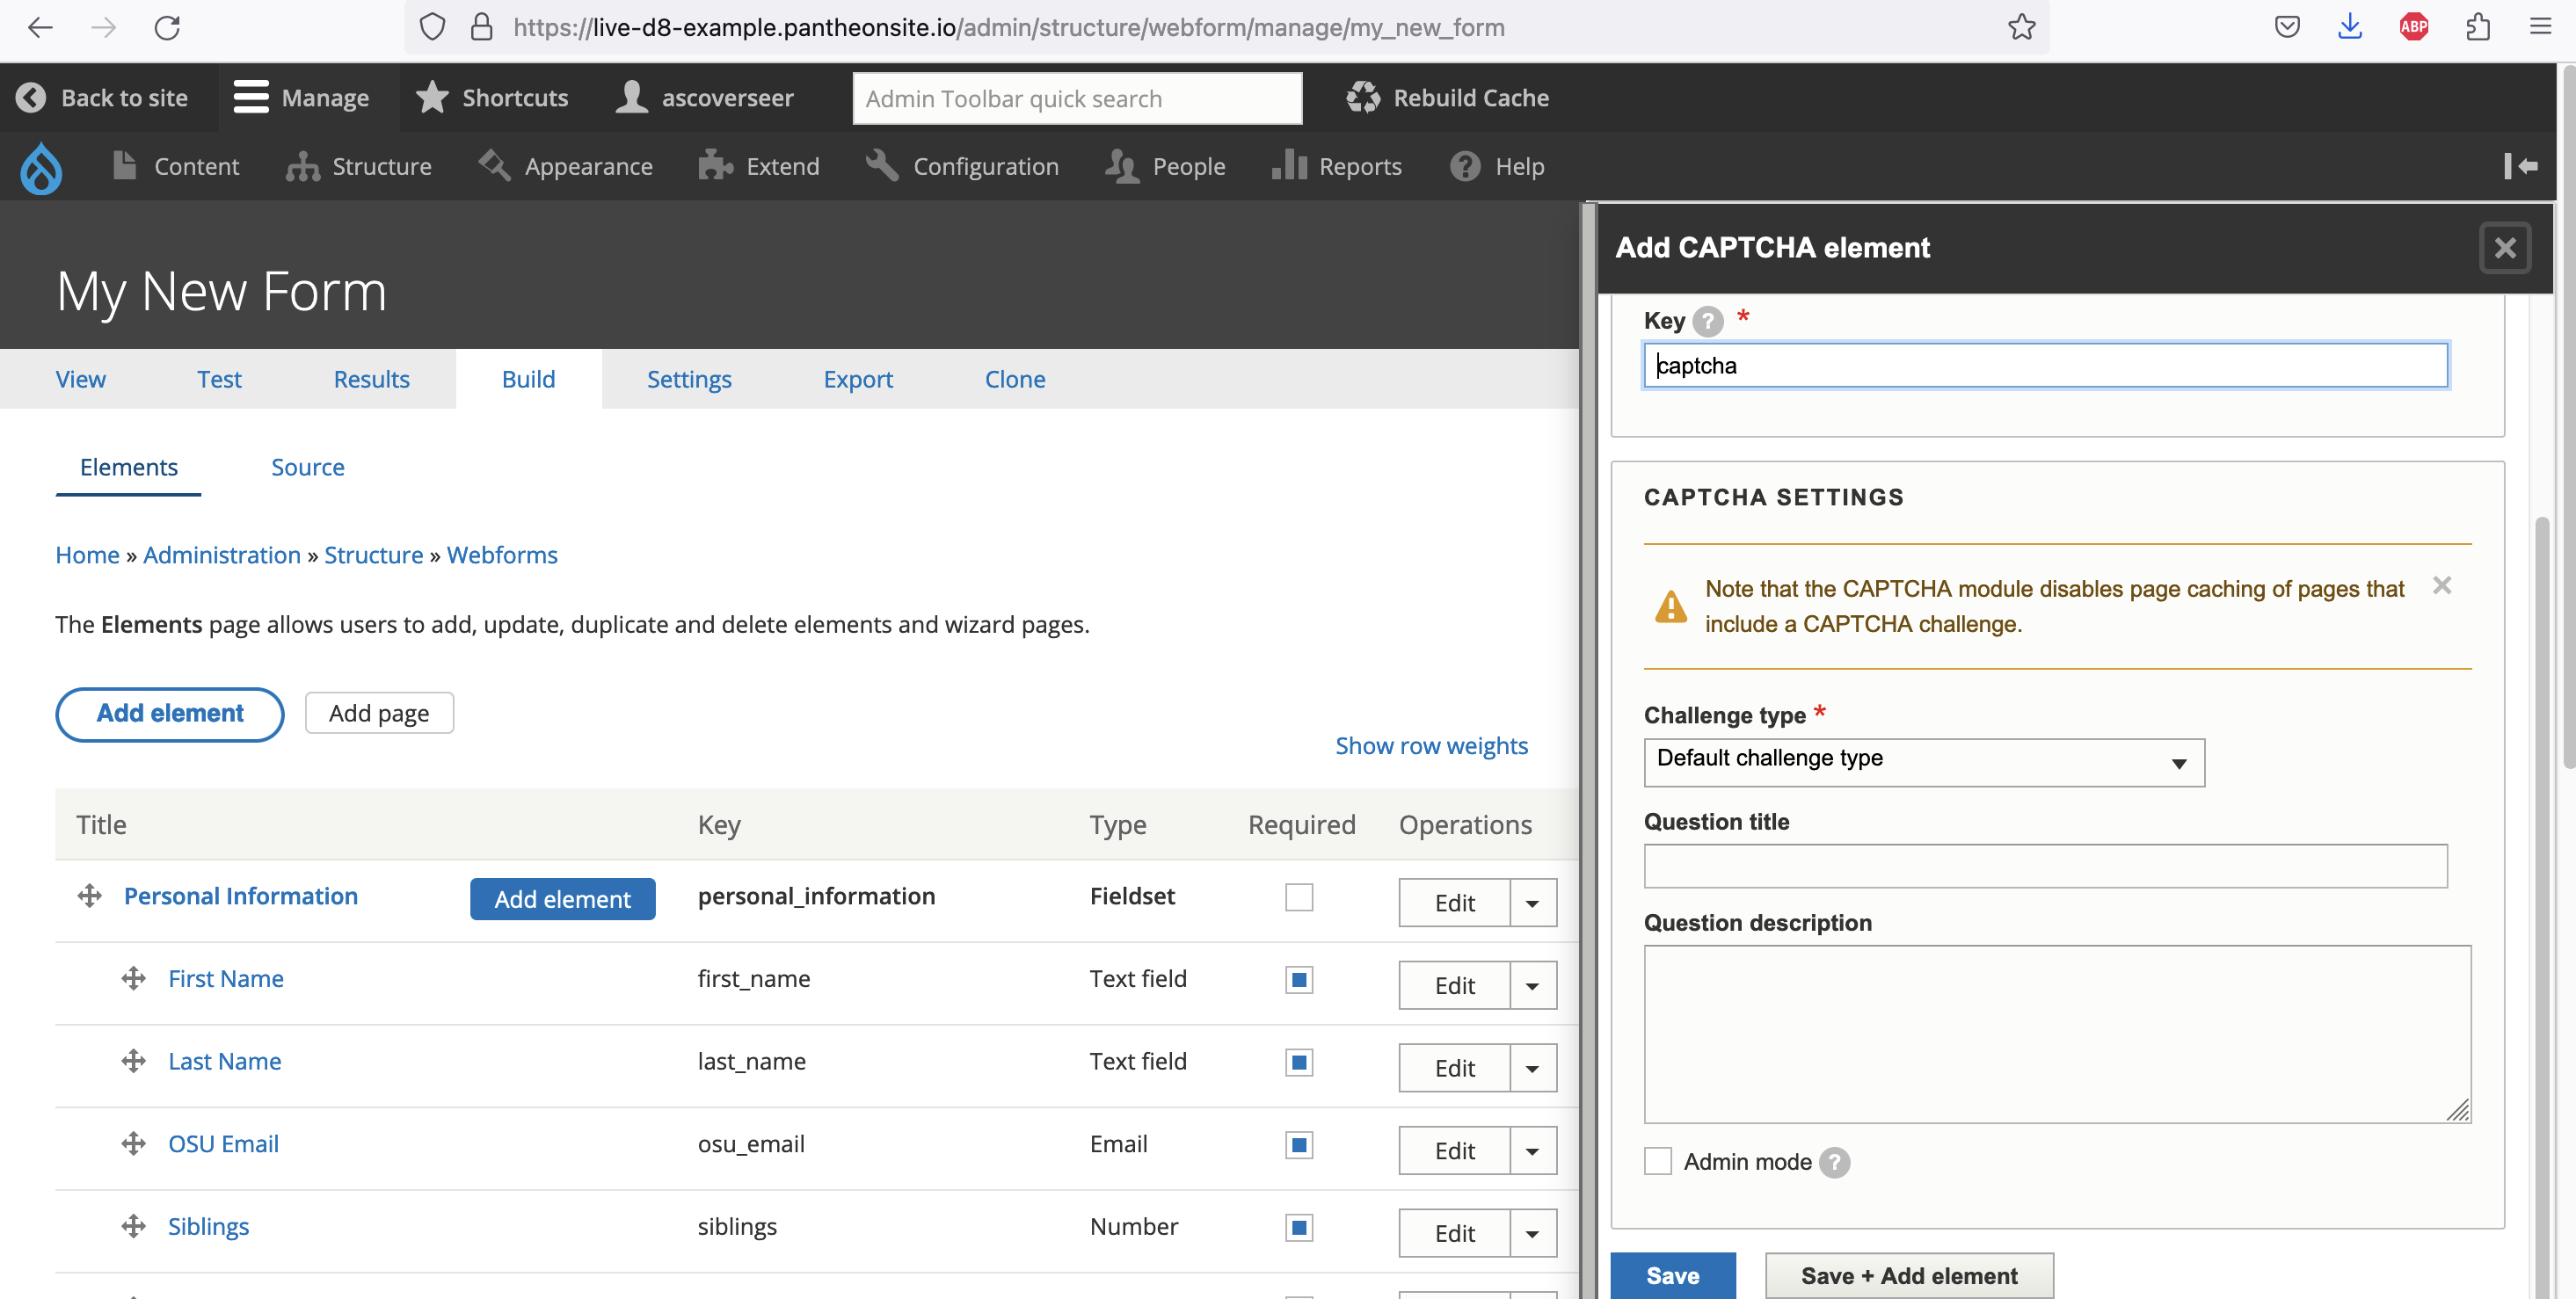
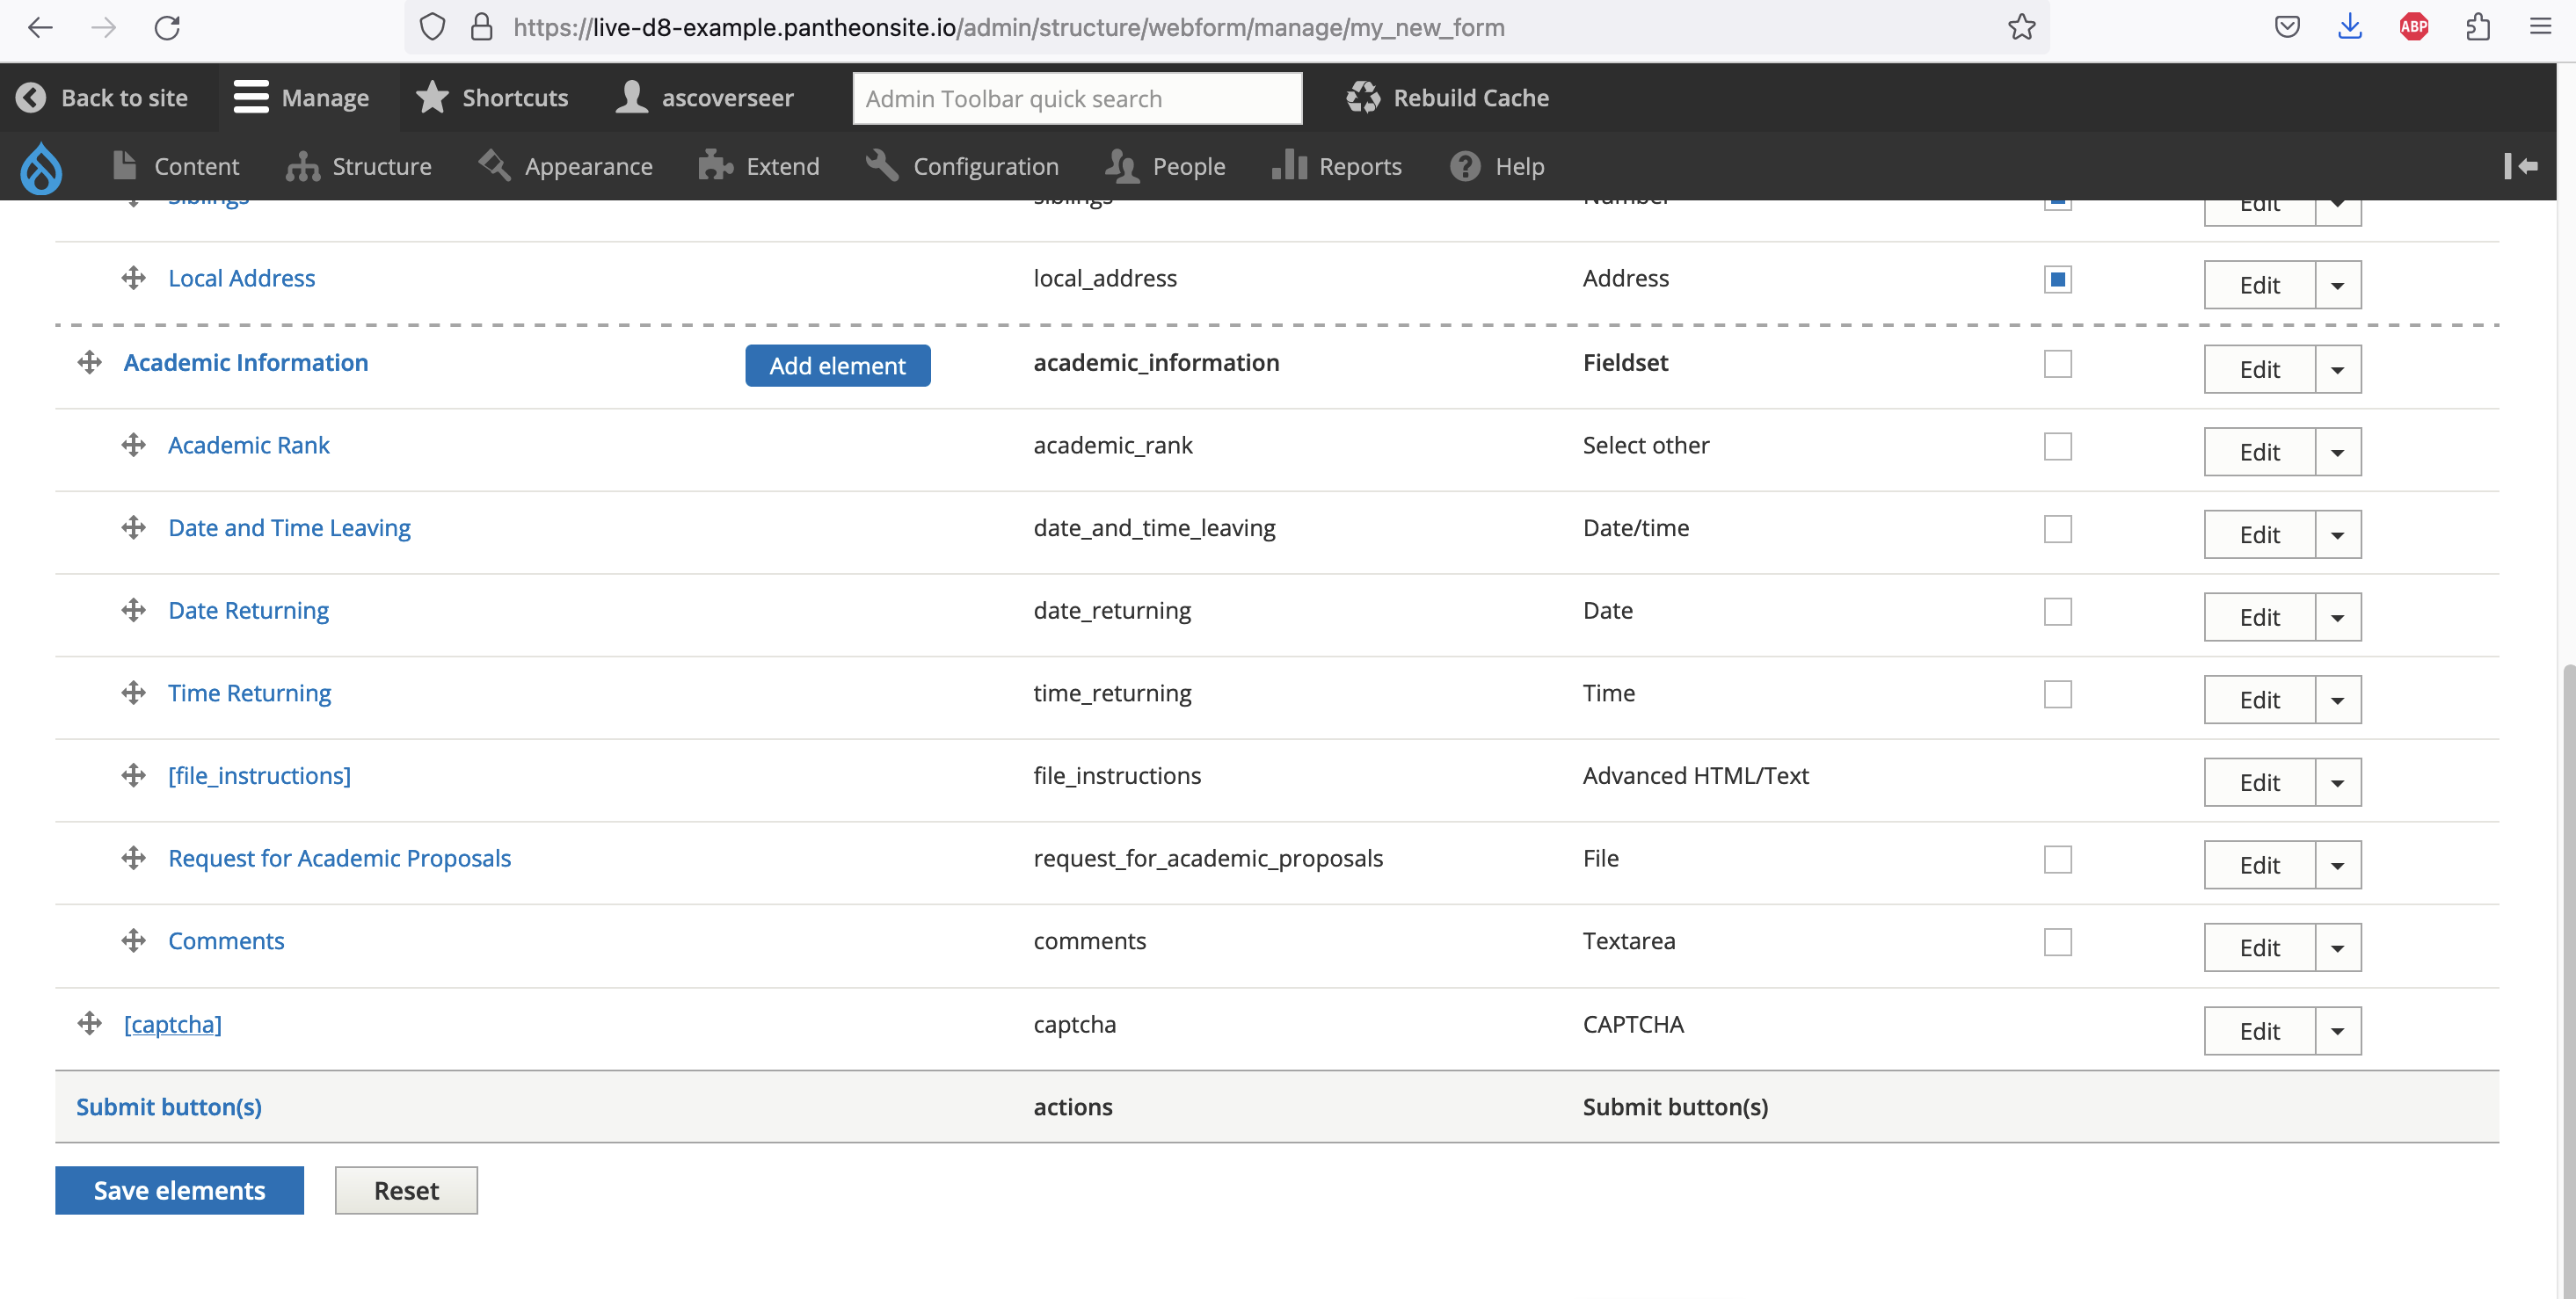
      • Create and edit webforms
      • View and manage form submissions

        Webform manager view with the Structure tab open, showing the Webforms menu followed by menus for opening forms and managing submissions
        Form for future student inquiries


        Research Manager

        Below is the full playlist of videos included in the Research Manager training for Drupal 8.

        You can review any materials here or can follow the link below to see them on YouTube.

        Features

        • Create and edit research content pages

        View on YouTube


          Research  landing page with list of research projects
          Picture of a research project page with lorem ipsum text

          Newsletter Manager

          Below is the full playlist of videos included in the Newsletter Manager training for Drupal 8.

          You can review any materials here or can follow the link below to see them on YouTube.

          Features

          • Create and edit newsletter issues and articles


            Newsletter manager view with the content tab open and options for making newsletter issues and articles
            Newsletter issue
            Newsletter article

            Profile User

            If you have a bio on an ASC website, you may have the option to login and edit the content on your profile page.

            To make edits, you’ll need your Web Content Owner to add the editing capability.


            Logging In

            Once you have access, you will be able to log in. Go to the bottom right of any page on the website and click on the white “LOGIN” link.

            This should bring you to your user profile by default. Above your name, you should see a new View and Edit links.


            Editing Your Profile

            Choosing Edit will take you to the editor interface for your page. Here you have access to change quite a bit of information! You can update:

            • Name
            • Photo (If NOT using OPIC)
            • Bio
            • Professional Information
            • Contact Information


            Photo

            One large caveat is we highly recommend using OPIC to manage your photo.

            This allows your image to be re-used across all University services and websites that link to OPIC services so that you do not have to keep re-uploading it every time.

            A good example might be a faculty member with a profile on both the Neuroscience Major and Neuroscience Graduate Studies Program websites.

            They would only need to update their photo on OPIC to have the change show across both sites.


            Using OPIC

            To use OPIC, visit that site, log in with your Ohio State name.# and password, and upload your image.

            As long as you have the Use OPIC box checked off in your website’s user profile, it will display that photo.

            Box that says "Use OPIC: Select if you want to use your picture from OPIC"


            Using the Image Override

            For users who prefer not to use OPIC, there is also an image override function located just above the Use OPIC box.

            Button in the Picture field in the Profile Editor screen for uploading a file with the Use OPIC checkbox under it


            To utilize this you’ll want to:

            • Uncheck the “Use OPIC” box
            • Have a 600×800 width by height image ready

            Click Choose File to upload your image. Once it’s on the website, make sure to fill in only your full name into the Alternative Text field that appears.

            This helps screen reading software recognize that the image is you! This is important for accessibility compliance.

            You might notice a white plus sign in the middle of your image.

            This is the focus point and it determines where the crop happens on the main directory page. You’ll want to place this directly in the center of your face.

            Picture of an uploaded profile picture with alt text displaying the user's name which says "Kristen Kirk"

            Bio

            Next up is our Bio area. Here you can put a short summary about yourself and what you do in the department.

            We encourage people to use this as a high-level overview of themselves, NOT as a personal website.

            For a complete experience creating a personal website, please utilize the free U.OSU web platform.

            Many of the Bio functions are very similar to programs like Word. You have the ability to bold, italicize, bullet-point, align text, etc. However, there are a few very important considerations for accessibility to keep in mind.

            Please review the Basic Pages: Part 2 video from our Content Editor training. While focused on the Basic Page, the Bio field functions exactly like the Body field there.

            It really is imperative you pay attention to the information in the video. Without it, you will not know how both accessibility and media work in the Bio field with the former being especially important legally!


            Professional Information

            The Professional Information section houses multiple fields for you to enter items like Job title or education.

            Please make sure that when adding social media like Twitter, you use the full URL; just using your @username will not link to your account.


            Contact Information

            Finally the Contact Information section houses such things as phone number and office information.

            The address field itself is what will generate a Google Map on your profile. Make sure to keep the room and building in it’s respective field and you’re good to go here!